This project was one I anticipated and wanted to do for years. I knew what I wanted it to look like, although I changed the details several times before I finally just did it.
It all started when I had to get my sprinklers fixed. I was speaking to the sprinkler repairman and I told him my idea for the front area of my house. He said I needed to pull out the sprinklers for the bushes and cap it off, but while we were talking he began pulling the bushes for me. Yay me! I'm sure he added it to the bill, but it sure helped push the project along.
He pulled out the three bushes I had in that area, pulled up the sprinkler piping and then capped it off for me. So, now I could finally push forward with my plans!
I forgot to take before pictures, but we have all seen it. Just imagine a few ugly bushes in front of my bay window with wood chips filling up the gaps. So here begins the project.
My kids were troopers. They did not complain once. We took the large gravel I already had on the side of my house and filled up the area.
Then we went down to American Stone in Lehi and we picked up 4 different loads of large stones. And very carefully we placed them around, until it was filled. Then we filled in the gaps with more gravel and sand.
Then I began putting on my planters.
I took two of my older outdoor chairs and I painted them a dark brownish, sparkly color. And I painted the table red.
And this is it. I completely changed the look of my front yard! And I love it! Now I can sit out in front and watch my kids play and enjoy my neighborhood!
Tuesday, July 1, 2014
Tuesday, June 10, 2014
Eyes Wide Shut
If you haven't come over to my other blog and checked out the teasers from my book, Theia's Moons - Eyes Wide Shut, PLEASE do!
http://theiasmoons.blogspot.com/
If you like what you read, then go to Amazon and download the e-book. I'm looking into sending the manuscript to a publisher and I hope it will be picked up by someone who knows what they are doing. I have done all the promoting I know I can do. The fate of this book, as of right now, lies in the hands of the people who know about it, like it and tell others about it. So, if you do like it, please let others know. Thank you, thank you!
http://www.amazon.com/Theias-Moons-Eyes-Wide-Shut-ebook/dp/B00K4G8SBS/ref=sr_1_1?ie=UTF8&qid=1402415971&sr=8-1&keywords=theia%27s+moons+eyes+wide+shut
http://theiasmoons.blogspot.com/
If you like what you read, then go to Amazon and download the e-book. I'm looking into sending the manuscript to a publisher and I hope it will be picked up by someone who knows what they are doing. I have done all the promoting I know I can do. The fate of this book, as of right now, lies in the hands of the people who know about it, like it and tell others about it. So, if you do like it, please let others know. Thank you, thank you!
http://www.amazon.com/Theias-Moons-Eyes-Wide-Shut-ebook/dp/B00K4G8SBS/ref=sr_1_1?ie=UTF8&qid=1402415971&sr=8-1&keywords=theia%27s+moons+eyes+wide+shut
Friday, June 6, 2014
My First Month
Crazy life I have! This month has been a roller coaster of a ride and
I'm still roaring to go. So... I haven't had any reviews on my novel,
as of yet. At first I was stressed, disheartened and maybe a little
sad. I thought I would have something by now. But my sweet guy, who
knows just what to say, suggested I be a bit more patient and not jump
to any conclusions. He had a lot of reassuring words and I am so lucky
to have him in my life.
I want this first book of mine to be a success. As of right now it is only an e-book and I have to do my own promoting, which I'm not really the best at. BUT I am working at it and I might even be a bit annoying. Bear with me. Support me. Give me feedback. AND most of all, tell others about my book. Be my word-of-mouth marketing posse!
Here is the link to my e-book on Amazon. If you haven't downloaded it, do it ASAP :) I would LOVE it and appreciate it a thousand times over. Thanks friends!
http://www.amazon.com/Theias-Moons-Eyes-Wide-Shut-ebook/dp/B00K4G8SBS/ref=sr_1_1/182-1736062-4036127?ie=UTF8&qid=1402111868&sr=8-1&keywords=theia%27s+moons+eyes+wide+shut
I want this first book of mine to be a success. As of right now it is only an e-book and I have to do my own promoting, which I'm not really the best at. BUT I am working at it and I might even be a bit annoying. Bear with me. Support me. Give me feedback. AND most of all, tell others about my book. Be my word-of-mouth marketing posse!
Here is the link to my e-book on Amazon. If you haven't downloaded it, do it ASAP :) I would LOVE it and appreciate it a thousand times over. Thanks friends!
http://www.amazon.com/Theias-Moons-Eyes-Wide-Shut-ebook/dp/B00K4G8SBS/ref=sr_1_1/182-1736062-4036127?ie=UTF8&qid=1402111868&sr=8-1&keywords=theia%27s+moons+eyes+wide+shut
Wednesday, May 14, 2014
Becoming an Author
This blog has been with me for so many years. Before I even began writing Eyes Wide Shut. Now my book is published after four years and I am excited and nervous to hear what others think. Here is a new blog post for Eyes Wide Shut. If you have not downloaded the e-book yet, please take the time soon and then once you have read the book, give me some feedback.
http://theiasmoons.blogspot.com/2014/05/becoming-author.html
Friday, May 9, 2014
Free!
For the next five days my novel will be a free download on Amazon! Please check it out and spread the word if you love it! Once again here is the link to it's blog, which include three teasers and the link to the Amazon E-book. Let me know what you think, the good, the bad and the ugly. I can only get better if I know where my strength's and weaknesses are. Thank you friends!
http://theiasmoons.blogspot.com/
Tuesday, May 6, 2014
Theia's Moons - Eyes Wide Shut
I finally got around to publishing a book I have been working on for four years. It has been a long road and I am looking forward to seeing where it can go. I am also working on the next book in this series and hoping to have it out before the end of the year! I have added the link to my new blog, where you can find the link to the e-book on amazon. Please share and write a review.
Thank you!
http://theiasmoons.blogspot.com/
Thank you!
http://theiasmoons.blogspot.com/
Friday, November 2, 2012
Repainting Side Tables
My friend found these gems on KSL for me. She knew I had been looking for some because they look a lot like the ones I had growing up. These ones are a little bit smaller than the ones my mom had, but I still LOVE them.
They were painted black and as much as I like black, I wanted them to match with the mirror I painted a while back. I didn't want to sand these so I applied the same primer as I did to the table and chairs.
Then I painted them blue...
It really is TOO blue for my taste, but once you add the Burnt Amber Glaze they look fabulous.
This is the finished project. I love how they turned out. They match my mirror and they go great in my living room. I want to do one more piece this color, but it will be in my kitchen which is adjoined to living room. It is the buffet table and will tie the two rooms in very well. Once it is done I will post as well. :)
Then I painted them blue...
Tuesday, October 30, 2012
Re-finishing the Dining Table and Chairs
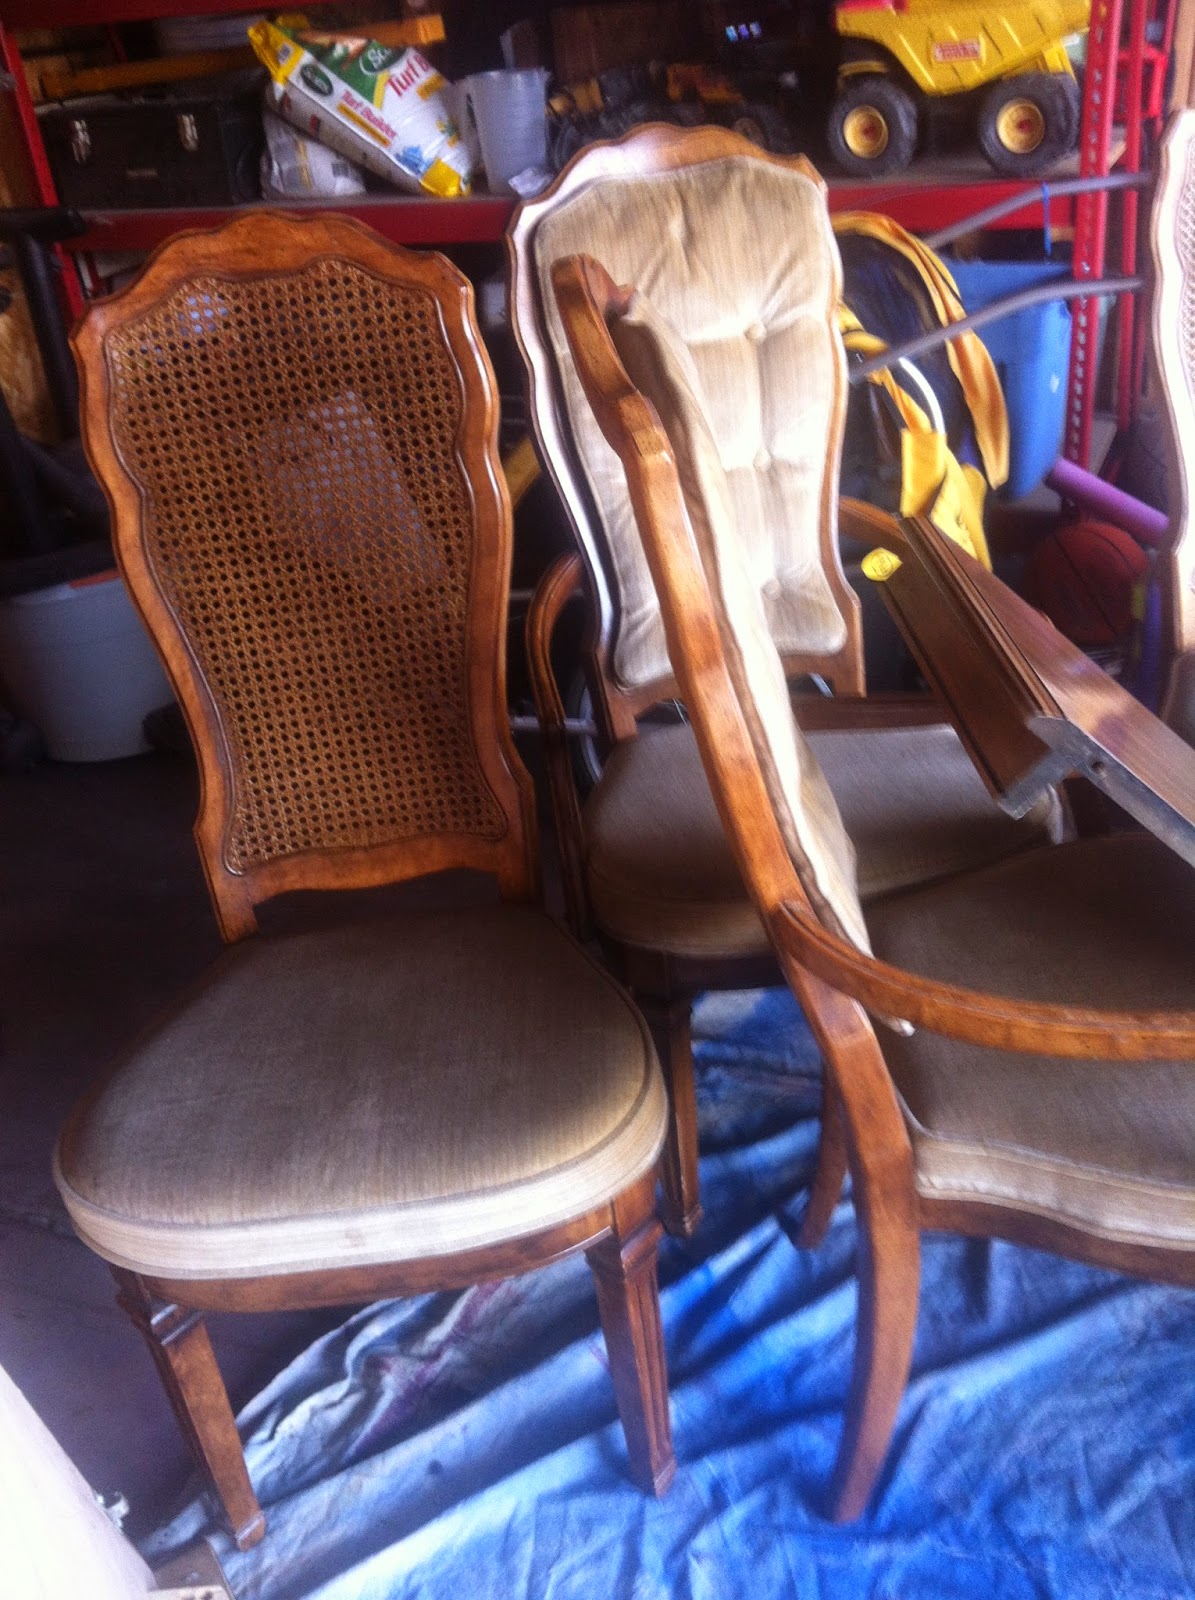
Finally I am back to painting. I have done 4 different projects and I have three more I am planning on finishing in the next couple of months. My largest project has been my table and chairs. My dad gave me my parents dining table and chairs. I have been looking on KSL for months, attempting to find a set I could refinish that was large enough for my family and guests. So when my dad said he was getting rid of his set, I was happy to take it off his hands. Here is what they looked like before:
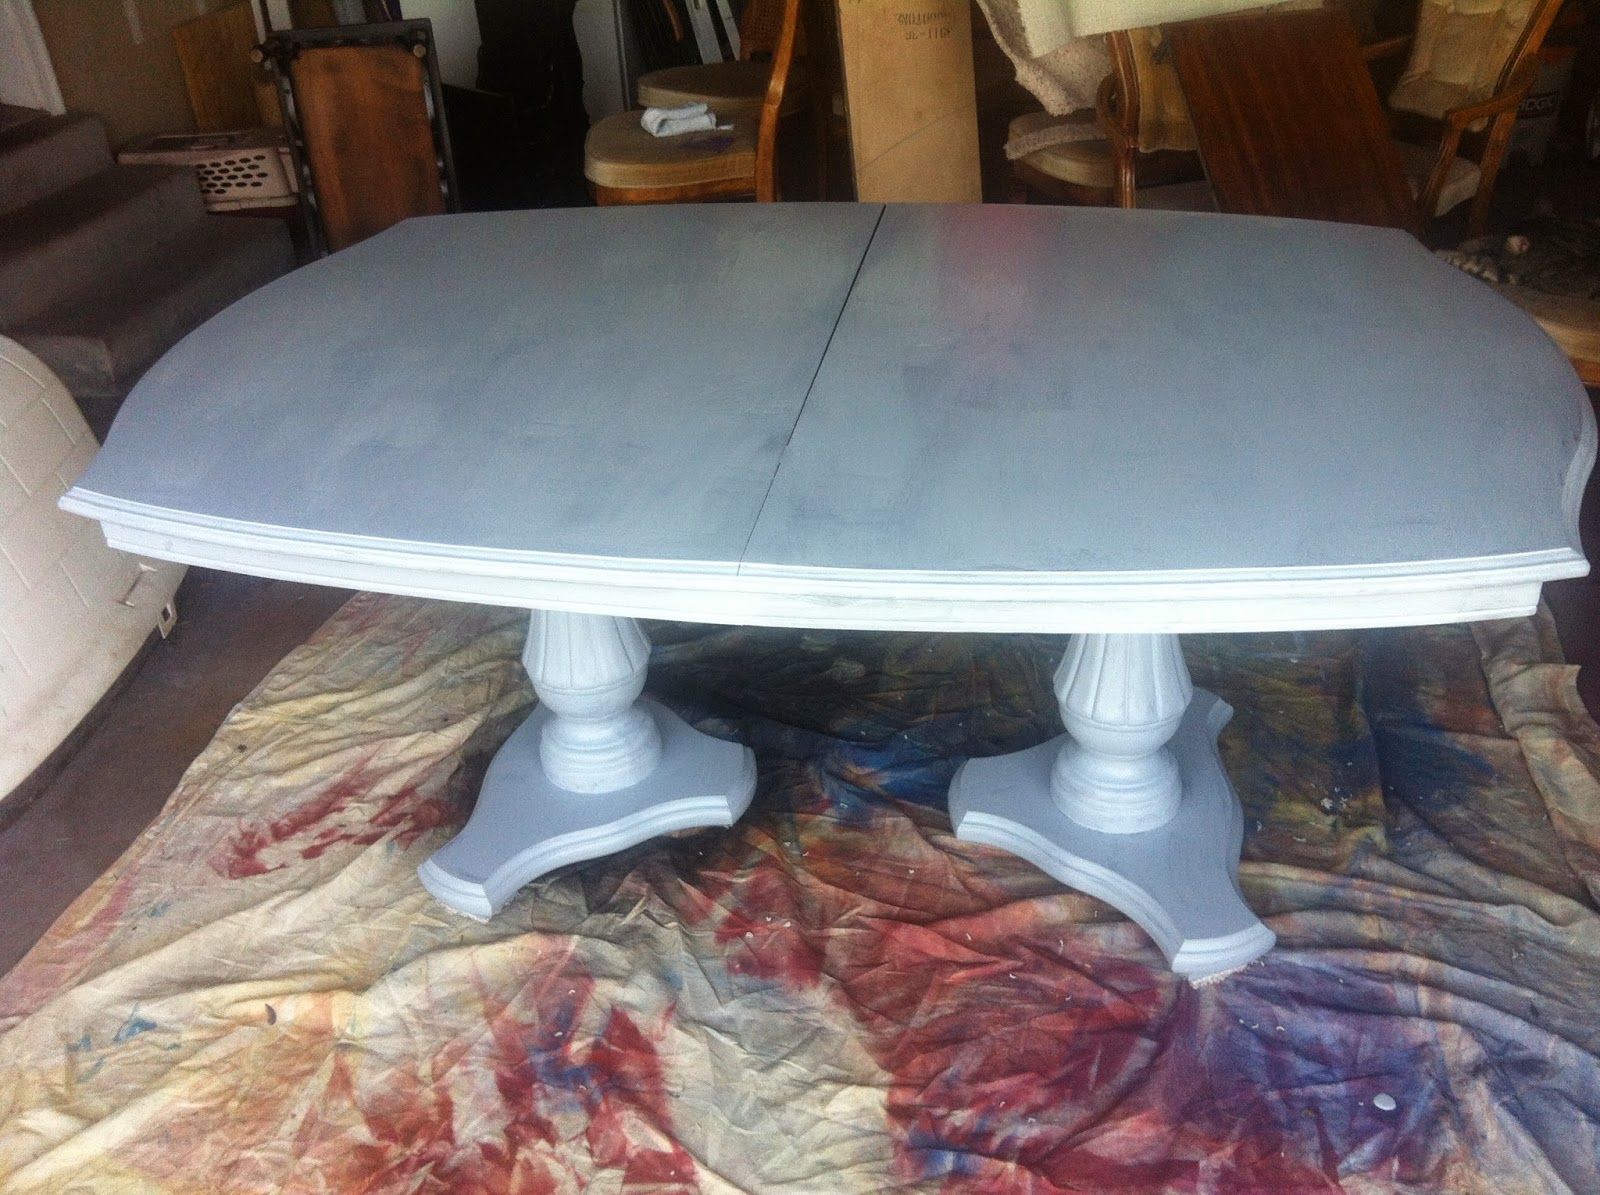
It was very crowded in my garage with the table and chairs. I took pictures the best I could. Sorry for the glare from the sun! I decided to put a primer on the table and chairs instead of sanding the whole thing. I did some spot sanding and then I applied this:
It is an excellent primer that requires no sanding. LOVE IT! And this is what they looked like after the primer was applied:
Then I painted on two coats of black paint and polyeurathane to seal in the paint. I originally used a glossy sealant, but I could see everyone fingerprint from my family! Here's the picture:
I apologize for the glare from the sun again. The table is too large to move and whenever I remember to take a picture the sun is shining bright! I will upload a better picture of the table and chairs when I get a chance. But for now this is what they look like! I love the final outcome and now I have a table that is large enough for company as well as my family. Now to reupholster all the chairs... :) I will post my other finished projects in the next few days!
It is an excellent primer that requires no sanding. LOVE IT! And this is what they looked like after the primer was applied:
So, I sanded it off and reapplied another coat of black and a new satin sealant. Here are the final pictures:
Thursday, January 19, 2012
Cloth table settings transformed into throw pillows
Here's a little project I did back in the fall that I never had a chance to post on my blog. I bought some fall leaf and and rectangle fall themed cloth table settings (or whatever they are called!). I unstitched a small part of each of them and stuffed them full. Then I hand stitched them back up and they were done. One of the easiest projects out there. In fact the hardest part was finding them. I tried two different Walmarts before I finally found them at the third one. Here is the final outcome...
Friday, October 14, 2011
Antique Vanity refinished
My kids great-grandma gave this lovely vanity to my daughter...
It's an old antique vanity that has definitely seen its share of years. The wear and tear on it was numerous and the amount of time I spent on it was many hours. It really took me months to do, but that is because it was hard to strip all the paint off and so I could only get an hour here or an hour there to work on it. Here is what it looked like after I got done sanding as much as I could off...
Then I got some water-based stripper and covered the remainder of the paint. It still took a while but I finally was able to get most of the old pink and green paint off! As you can see, I could not get everything, but I sanded the remainder down as well as I could.
This color showed every knick and disfiguration, which really bugged me! I almost sanded it down again, but I don't think this wood can take much more sanding. So I got my handy burnt amber glaze out and wiped the vanity down with it. I made sure I wiped off any excess with another rag as I went along, so it wouldn't over power the blue. Here's the glaze...
And here is the final product...
We still have to get some of the paint off the mirror, because I was too lazy to tape it. But it shouldn't be too hard. Definitely easier than stripping that paint! My daughter loves the final outcome and really that is all that matters.
It's an old antique vanity that has definitely seen its share of years. The wear and tear on it was numerous and the amount of time I spent on it was many hours. It really took me months to do, but that is because it was hard to strip all the paint off and so I could only get an hour here or an hour there to work on it. Here is what it looked like after I got done sanding as much as I could off...
Then I got some water-based stripper and covered the remainder of the paint. It still took a while but I finally was able to get most of the old pink and green paint off! As you can see, I could not get everything, but I sanded the remainder down as well as I could.
Then I painted the entire vanity this color...
This color showed every knick and disfiguration, which really bugged me! I almost sanded it down again, but I don't think this wood can take much more sanding. So I got my handy burnt amber glaze out and wiped the vanity down with it. I made sure I wiped off any excess with another rag as I went along, so it wouldn't over power the blue. Here's the glaze...
And here is the final product...
We still have to get some of the paint off the mirror, because I was too lazy to tape it. But it shouldn't be too hard. Definitely easier than stripping that paint! My daughter loves the final outcome and really that is all that matters.
Tuesday, October 11, 2011
Healthy Habits
I have lost 13 pounds... in 10 weeks. I actually lost 7 pounds in 2 weeks, gained 1 pound back the next week and then began working out the next week. From there in 7 weeks I lost 7 pounds and in total 13. I have changed my eating habits, beginning with those first two weeks, where I did the South Beach diet. From there I have learned to eat smaller meals, have small healthy snacks in between my meals and keep the chocolate and sweets out of my diet as much as possible. Now don't get me wrong... I still eat chocolate and sweets, but I am so much better about it. For example... my friend at work brought in chocolate covered macadamia nuts (my favorite). The first day I had 6 of them... was a bit rough, but before I changed my ways I would have had 20. On the second day I only had 2. Much better!
I am working out 4-6 times a week. I really LOVE the feeling of finishing a 45 minute interval jog/walk. I LOVE the feeling of finishing 45 minutes of Zumba or Yoga or riding my exercise bike. It makes me HAPPY! My best weeks are the ones I complete 6 days of exercise and so my goal is to do as many days of exercise as I can. Even if I only get 20 minutes in... that's better than 0 minutes right?!!? The hardest part of working out is starting. Once I start I feel like I am on top of the world. And losing around 3 inches of my waist has made a huge difference in how I feel. I've gone down a size in my jeans and all my clothes fit so much better. But really it isn't about the pounds, at least not entirely. It's the way I feel.
I found this awesome little home boot camp work sheet on pinterest and it will be my new workout, for at least 2-3 times a week. I'll probably repeat the drills so it will be around 50 minutes to complete the whole boot camp. Give me a few weeks and I will let you know how things are going. Hopefully, with the boot camp, jogging, yoga and zumba I will begin to completely transform my body!
Here's to a healthy and strong life! Cheers!
I am working out 4-6 times a week. I really LOVE the feeling of finishing a 45 minute interval jog/walk. I LOVE the feeling of finishing 45 minutes of Zumba or Yoga or riding my exercise bike. It makes me HAPPY! My best weeks are the ones I complete 6 days of exercise and so my goal is to do as many days of exercise as I can. Even if I only get 20 minutes in... that's better than 0 minutes right?!!? The hardest part of working out is starting. Once I start I feel like I am on top of the world. And losing around 3 inches of my waist has made a huge difference in how I feel. I've gone down a size in my jeans and all my clothes fit so much better. But really it isn't about the pounds, at least not entirely. It's the way I feel.
I found this awesome little home boot camp work sheet on pinterest and it will be my new workout, for at least 2-3 times a week. I'll probably repeat the drills so it will be around 50 minutes to complete the whole boot camp. Give me a few weeks and I will let you know how things are going. Hopefully, with the boot camp, jogging, yoga and zumba I will begin to completely transform my body!
Here's to a healthy and strong life! Cheers!
Thursday, September 15, 2011
Old Wreath gets a Make-over
I've had this wreath for a few years now and it has been whipped around in the wind on my front door and taken a real beaten. So this year I wanted a new one. Then I was on pinterest and saw some fabulous ideas on making fall wreaths. I pulled out my poor wreath and I refurbished it and I love the new look!
BEFORE:
BEFORE:
I bought some ribbon from the $1 box at Walmart, a box of little fake pumpkins and one bouquet of fake fall flowers. After I placed the ribbons where I wanted them (randomly around the wreath), I heated up my hot glue gun and placed the flowers, fall leaves and pumpkins around the wreath as well. I had bought a letter W a while back and decided to throw that in the middle. I spray painted it white and stapled it to one of the ribbons and Wah-lah...
It has a whole new look to go on my newly painted front door. LOVE IT!
Tuesday, September 13, 2011
Creating my own Shelves
I have wanted to make these shelves since I saw them shown on Studio 5 here in Utah. For the life of me I can't find the blog of the lady who showed these. I had her in my favorites on my blog, but I can't find it for some reason.
Anyway, she got the idea from Pottery Barn. I believe she used either 1x4 or 2x4 boards. I don't know if mine are 1x4's. I think they are maybe 3/4" instead of 1". They had been the slates in my kids old beds, so when I got them new beds I thought they would be perfect to use for the shelves. Here is the final look...
And here is them on the wall in my living room...
So here is how I created them...
I nailed two boards together and then nailed the molding on with small nails. I just bought a basic molding from Home Depot to use as an edging.
I then sanded the whole thing and applied a white primer...
I then took my handy Burnt Amber glaze (bought at Kwals Paint) and a rag and I wiped the glaze on. Make sure you use gloves when you glaze. It can be pretty difficult to get off especially if it gets in your fingernails (I had a glove break on me before).
And here is the final product after the second coat...
Here is the picture of one of Pottery Barn's shelves...
Mine are a bit more rustic, but they are pretty similar. And they cost me next to nothing to make. And even if you don't have all the supplies, I know Home Depot has scraps for really cheap. I believe these are $35 for 3 and mine were maybe $3 for all 3.
I then added a Polyurethane coating to protect them from wear and tear. After I let that dry for a few days, I used long screws and screwed the backs directly into the wall. I thought of other ways to mount them, but considering any screw would be hidden with whatever I put on the shelves, this seemed to be easiest way. Here is the final product on the wall before I put anything on them...
Right now I am still experimenting on what I want to put up there. I definitely want my Thomas Kinkade painting up there and since it is fall, I added the fall dishes. I want the picture frames too, but I still might change it up.
We will see. For the fall I will leave it this way, since it will all change for the Chrismas season.
After the New Year I will look at other ways to put the deco's and maybe change things up. It was definitely fun to create these shelves and a lot easier then I thought and cheaper than buying them from Pottery Barn. I plan on making more. One for my bathroom, except it is a 1x6 shelf and a couple each for my kids to put their dance and Taekwondo trophies on. If you have any questions about the process let me know and I will be happy to assist.
Anyway, she got the idea from Pottery Barn. I believe she used either 1x4 or 2x4 boards. I don't know if mine are 1x4's. I think they are maybe 3/4" instead of 1". They had been the slates in my kids old beds, so when I got them new beds I thought they would be perfect to use for the shelves. Here is the final look...
And here is them on the wall in my living room...
I nailed two boards together and then nailed the molding on with small nails. I just bought a basic molding from Home Depot to use as an edging.
Here is the picture of one of Pottery Barn's shelves...
Mine are a bit more rustic, but they are pretty similar. And they cost me next to nothing to make. And even if you don't have all the supplies, I know Home Depot has scraps for really cheap. I believe these are $35 for 3 and mine were maybe $3 for all 3.
I then added a Polyurethane coating to protect them from wear and tear. After I let that dry for a few days, I used long screws and screwed the backs directly into the wall. I thought of other ways to mount them, but considering any screw would be hidden with whatever I put on the shelves, this seemed to be easiest way. Here is the final product on the wall before I put anything on them...
Right now I am still experimenting on what I want to put up there. I definitely want my Thomas Kinkade painting up there and since it is fall, I added the fall dishes. I want the picture frames too, but I still might change it up.
We will see. For the fall I will leave it this way, since it will all change for the Chrismas season.
After the New Year I will look at other ways to put the deco's and maybe change things up. It was definitely fun to create these shelves and a lot easier then I thought and cheaper than buying them from Pottery Barn. I plan on making more. One for my bathroom, except it is a 1x6 shelf and a couple each for my kids to put their dance and Taekwondo trophies on. If you have any questions about the process let me know and I will be happy to assist.
Friday, September 9, 2011
Using Rustoleum stone spray paint
I have had this old metal milk jug for about 12 years. The last couple of years I had been looking at it, wondering how I could change it up with the least amount of effort! Lo and behold, I was in Walmart the other day looking at their spray paints, when I discovered Rustoleums stone spray paints! It was perfect! Here is what the jug looked like before:
Notice the darkening on the bottom. It really was getting outdated and ugly. Here is the spray paint I used. I forgot to take a picture so I just looked it up online!
And here is the end result and it has a made a world of difference in the whole look of my family room!
So simple and so easy to do! Those are some of my favorite projects. It isn't really anything wonderful color wise, but it did make a difference in how the flowers stood out. It also matched my the color of my new doors, another project found here: http://nikisoddsandends.blogspot.com/2011_04_01_archive.html
Subscribe to:
Posts (Atom)